
We all know how frustrating it is to wake up in the morning expecting a fully charged mobile phone, and alas! You forgot to turn on the charger at night. We, golfers, can relate to it on another level. Imagine looking forward to a game all week, and when the day finally arrives, you wake in the shiny morning, excited about it, all prepared and ready to go, but when you reach the garage, your golf cart is sitting there lifeless. The charger you plugged in overnight seems to have malfunctioned, leaving your cart with a dead battery.
The reasons behind an uncharged cart are multifold. It can either be your batteries, your motor, or your charger. Diagnosing where the problem lies is the first and sometimes the most complex.
If you’re lucky, your golf cart charger not working because of a loose connection, worn-out cables, or a faulty plug head. In that instance, you can get going with quick, effortless fixes. However, the problem can be a lot more complex.
Golf cart charger not working | Step-by-step solutions

In this guide, I will walk you through all the reasons why your golf cart charger is not working and effective ways to troubleshoot them.
Step 1 – Spot the problem
Modern-day chargers are manufactured in such a manner that they only charge a battery after detecting a certain amount of voltage in it, about 25-30 volts.
To diagnose where the problem is, connect a voltmeter to your batteries and check their initial voltage.
If you have a new charger, and your batteries’ initial voltage is below 25 volts, the charger is not the problem. Take the batteries out of the cart and charge them individually with your car’s charger for 15-20 minutes. Then put them back in the cart and continue charging conventionally.
Whereas, if your batteries’ initial voltage is above 25 volts, and they’re still not charging, the problem lies within the charger.
P.S: I would recommend going through this reference guide as well about golf cart charging time, after you end up reading this guide.
Step 2 – Find out the extent of the problem
Finding out the degree of damage is the other important step toward troubleshooting. You need to figure out whether your charger is charging at all or not.
- Attach the voltmeter and record the initial voltage of your cart.
- Now connect the charger and leave it for an hour or two.
- Disconnect the charger and link the voltmeter again.
- Record the latter reading.
Normally, a charger charges 10-15% in an hour. If your charger is charging too slowly or abruptly, it may be due to a loose connection or a tattered wire. While if it is not working at all, the problem can be systematic and more complex.
Step 3 – Check if you’re using the right charger

For a charger to work efficiently, its voltage should synchronize with your device’s. For example, if you use a 36-volt charger to charge a 48-Volt golf cart, you will face difficulties. To find out the voltage of your golf cart,
- Count the number of cells on your battery. Each cell equals 2 volts. ( For example, your battery has 4 cells)
- Multiply the number of cells with 2 volts. (4 x 2 = 8)
- Multiply the number you get by the total number of batteries. (8 x 6 = 48)
- The number you get is the voltage of your cart (i.e. 48 volts).
- Get a charger that matches this voltage
Step 4 – Check if your charger is out of order
Just like golf cart batteries, cart chargers also have a lifespan. You cannot expect them to run forever. If you leave the charger plugged in for too long or not long enough, it can get heated up and run out. A faulty charger can damage your batteries and make them dead.
- Connect your charger.
- If it makes a clicking sound, it shows that your charger knows it has to work. Yet, doesn’t.
- Do not connect it to your batteries.
- It is best to let a professional deal with it
Step 5 – Look for loose connections

Once you know you are using the right charger, it is time to look for more fundamental issues. A major one of which is loose connections. Over time, charger plugs and sockets lose their grip and become wobbly, which impedes the way of current flow.
- Unplug the charger and turn the switch off for safety.
- Replug it and check if the plug head is firmly latching onto the battery terminals and switches.
- If not, replace the plugs and sockets
Step 6 – Check the cables
Having checked the connections, you must carefully inspect the cables and plugs. Sometimes, when cables are left sitting on top of each other for a while in hot temperatures, their covering abrades or fuses together.
- Unplug the charger from the socket and the cart.
- Inspect the cable’s length for any signs of wear or damage.
- Replace frayed wires.
- Inspect the plug end and socket end of the charger.
- Check the metallic clips on each end for any twists or bends.
- Use a pair of pliers to fix the clips.
- If too crooked, replace the plugs.
Step 7 – Look for any corroded parts
Another major reason for a golf cart charger not working is debris or corrosion on the charger’s or battery terminals’ metallic parts.

- See if there is corrosion on cable terminals or other parts.
- Scrub the rust with a soft brush.
- Apply an anti-corrosive lubricant over those areas.
- Or, you can mix 1 part water and 1 part baking soda to form a thick paste and use it to scrub the rust off.
- Wipe away all the debris with a clean paper towel.
- Let the terminals dry.
- Remove any dust or dirt from all over the charger and batteries.
- Reattach all the connections.
Step 8 – Check for water damage
Water damage is apparent when golf carts and their chargers are left in the open or in places that can flood. If you suspect your cart has water damage,
- Let it sit for a day in the sunlight.
- If the parts are still not working, it’s time to go deep.
- Open up the motor, batteries, and charger parts.
- Let them dry for some hours under a high-speed fan in a dry area.
- Put them upside down to let the water drip out.
- Once they are completely dried, put them back together.
- If it still doesn’t work, consult an expert.
Step 9 – Check the fuses
Chargers may stop working due to blown-up fuses. If you suspect a blown-up fuse,
- Remove the covering of the golf cart charger with the help of a screwdriver.
- After undoing the screws, have a good look over all parts of the charger.
- A blown-up fuse can easily be detected.
- Snap the fuse out of its holder.
- Undo the screws that attach it to the wires on both ends.
- Replace it with a new fuse of the same amps.
- Attach it with the wires.
- Snap the fuse back into its holder.
- Use a multimeter to check the continuity of the fuse and connecting wires.
- Put the charger case back together and test it.
Step 10 – Check the relay circuit board
A bad relay circuit board is easily visible when you open up a charger. It can either be blown up or may have water or rust damage over it.

- Undo the screws in front of the circuit board with a screwdriver.
- Swiftly pull it out from the back.
- Unhook the wires attached at the back of the relay.
- Now put a new relay circuit board and connect wires to it.
- Put it in the holder and screw it back.
Step 11 – Check the meter
Besides the fuse and the relay circuit, a number of other parts in a charger can be the reason for the club cart charger not working. A faulty meter might not stop charging, but it can misguide the user by showing incorrect readings. A non-functional meter can be seen on the face of the charger.
- Open up the charger case.
- Squeeze the sides of the meter, and it will pop out of its frame.
- Replace the defective meter with a new one.
- Pop it back into its frame.
- Screw the case back.
Step 12- Check the circuit breakers
Some chargers have a single circuit breaker in them. While others have a pair. Replacing a broken-down circuit breaker is not difficult at all.
- Undo the charger casing.
- Unscrew the breakers.
- Replace them with new ones and screw them back.
- Put the casing back together.
Step 13 – Check the transformer winding
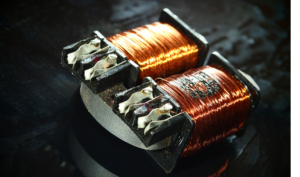
If your charger’s transformer winding is damaged, it indicates it has completed its lifespan. A new transformer is going to cost you as much as a new charger. It’s better to discard this charger and get a new one.
Step 14 – Check the power outlet
Sometimes, power outlets can also be a problem. After checking all of the above aspects, have a look at your electric outlet. Glitches in the circuit inside the power outlet can burn and melt the wires. Debris can also get collected in those small holes and thwart between plug clips and sockets.
- Make sure your hands are dry.
- Turn the switch off.
- Sense if there is any burning smell from inside the circuit.
- Unscrew the outlet with the help of a screwdriver.
- Look for any signs of damage or debris.
- After fixing, put the casing back.
FAQs
Q) How do I know if my golf cart charger is bad?
A) To be sure that your golf cart charger has a problem, check the initial voltage of your batteries with the help of a voltmeter.
Most chargers need an initial voltage of 25 volts to start charging. If your charger is not working even after having that voltage, it is evident that it has gone bad.
Q) Can you repair a golf cart charger?
A) Repairing a golf cart charger depends upon the extent of your problem. You can fix it with the solutions discussed in this guide if it is merely a loose connection, an abraded wire, or a corrosive terminal.
However, if it is something more complex, like a faulty machine or a water-damaged core, have it looked at by a professional.
Q) How do you force a golf cart battery to charge?
A) If your batteries are not picking up charge at all and are completely dismissed, there is a way to bring them back to life.
Take the batteries out of the cart. Charge them individually with your car’s charger for 15-20 minutes each. When their voltage level reaches 25-30 volts, put them back in the cart and continue charging with the golf cart charger.
Q) What is the minimum voltage for a golf cart charger?
A) Nowadays, modern golf cart chargers do not charge until they detect a certain amount of initial charge in the batteries. This minimum voltage is 25-30 volts per battery.
️⛳️ Related Reads:
In conclusion

To conclude the discussion, most of the golf cart charger problems are simple and fixable. With the help of this guide, you can fix loose connections, rigged wires, corroded parts, fuses, circuits, and meters all by yourself.
Remember that all chargers have a life expectancy. Chargers that break down often can transfer the problem to your batteries and cart system. If you keep repairing your decade-old charger, it can affect the overall cart performance. You can have an interrupted experience with your charger with proper caution and upkeep.
If you are having trouble troubleshooting golf cart charging problems yourself, feel free to consult an expert.
A guy with a charming face following his passion (both Golf and Blog) from Kansas. Bryan is the writer and creator of IAmLearningHowToGolf.com, loves golf, but he didn’t start playing until he was in his 20s. He’s not a pro by any means, but he’s put in the time and effort to get pretty darn good. Bryan’s main goal with this blog is to help other golfers improve their game and have more fun on the course. He does this by writing informative, relatable, and down-to-earth content. When he’s not golfing or writing, Bryan enjoys going on hikes, spending time with his family, and watching movies sometimes. For any queries reach out to him at Bryan@iamlearninghowtogolf.com.